Your email marketing campaign is ideally designed, your content is flawless and all your loyal recipients are more than happy to receive your messages. But… your email never arrives to their inbox. Why? Email deliverability is one of the greatest problems of every email marketing campaign.
How can you achieve Email Deliverability?
In this blog post, we will explain step-by-step how your company can achieve email deliverability through email authentication, the most useful technical solution that prevents emails from the spam folder and helps them successfully reach the inbox.
For our step-by-step guide we use the power of Zoho CRM, the world’s favorite customer relationship management software, that empowers a global network of over 150,000 businesses in 180 countries to convert more leads, engage with customers, and grow their revenue.
Step 1
Email deliverability for Zoho CRM
One of the most important settings in a Zoho CRM account is the email authentication.
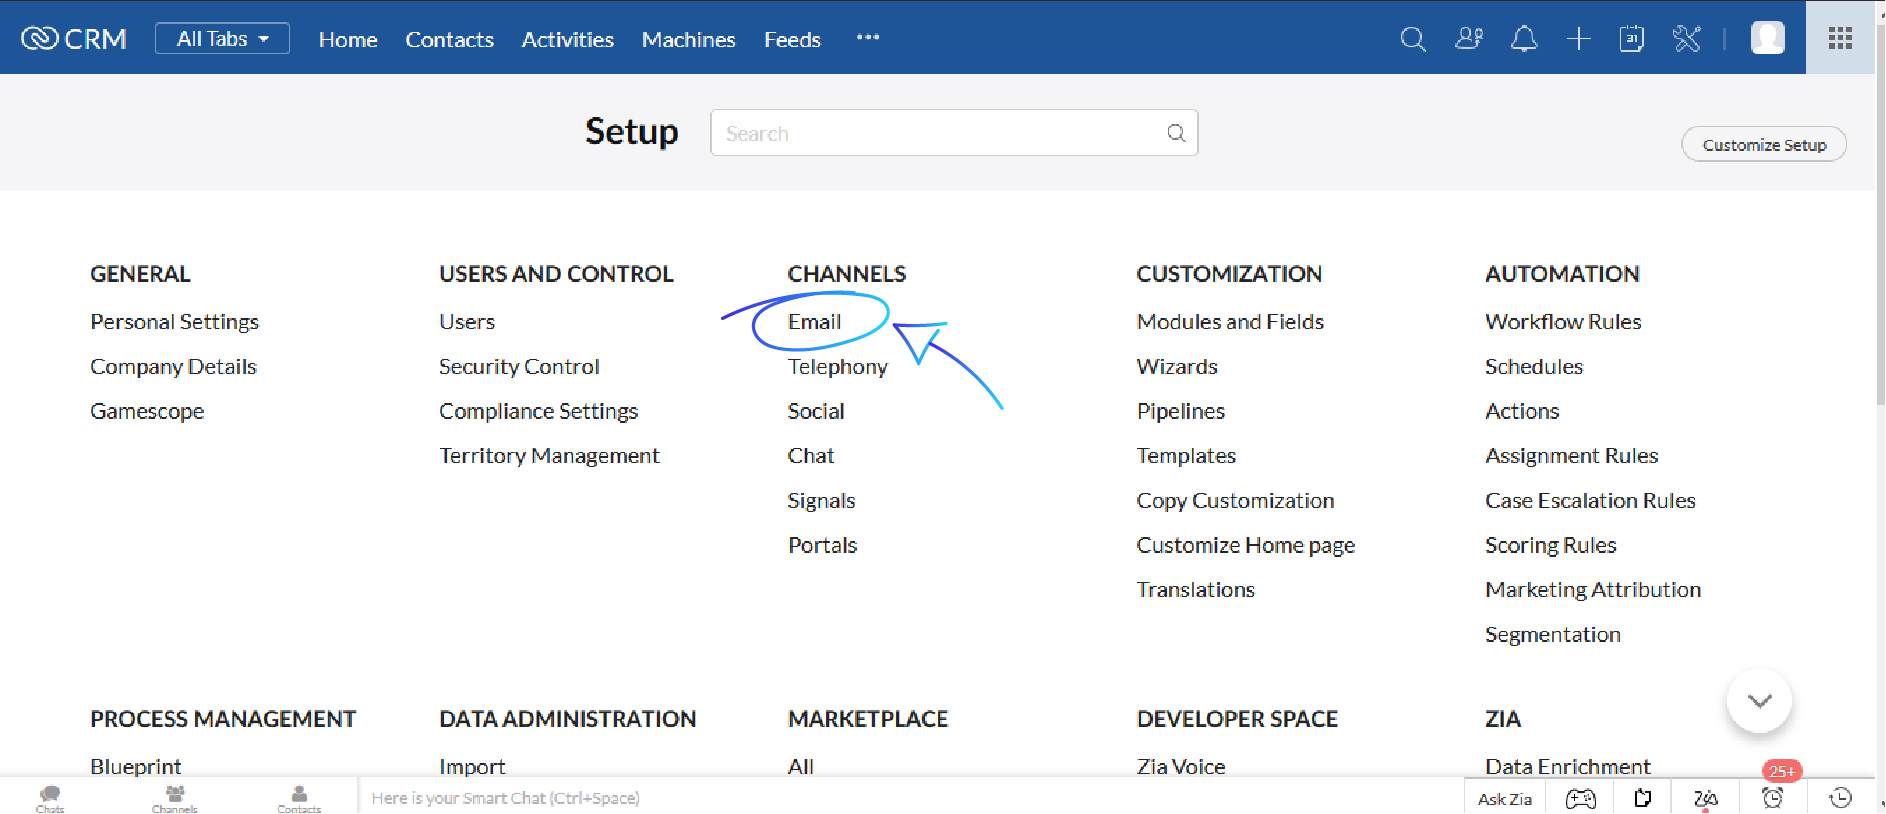
Email is under the “channels” settings in Zoho CRM.
From there you can configure your email senders, email inbox, enable email insights and email sharing preferences.
Step 2
Go Settings -> Channels -> Email -> Email Deliverability and click add domain.
Write a domain email address for example info@yourdomain.com

Step 3
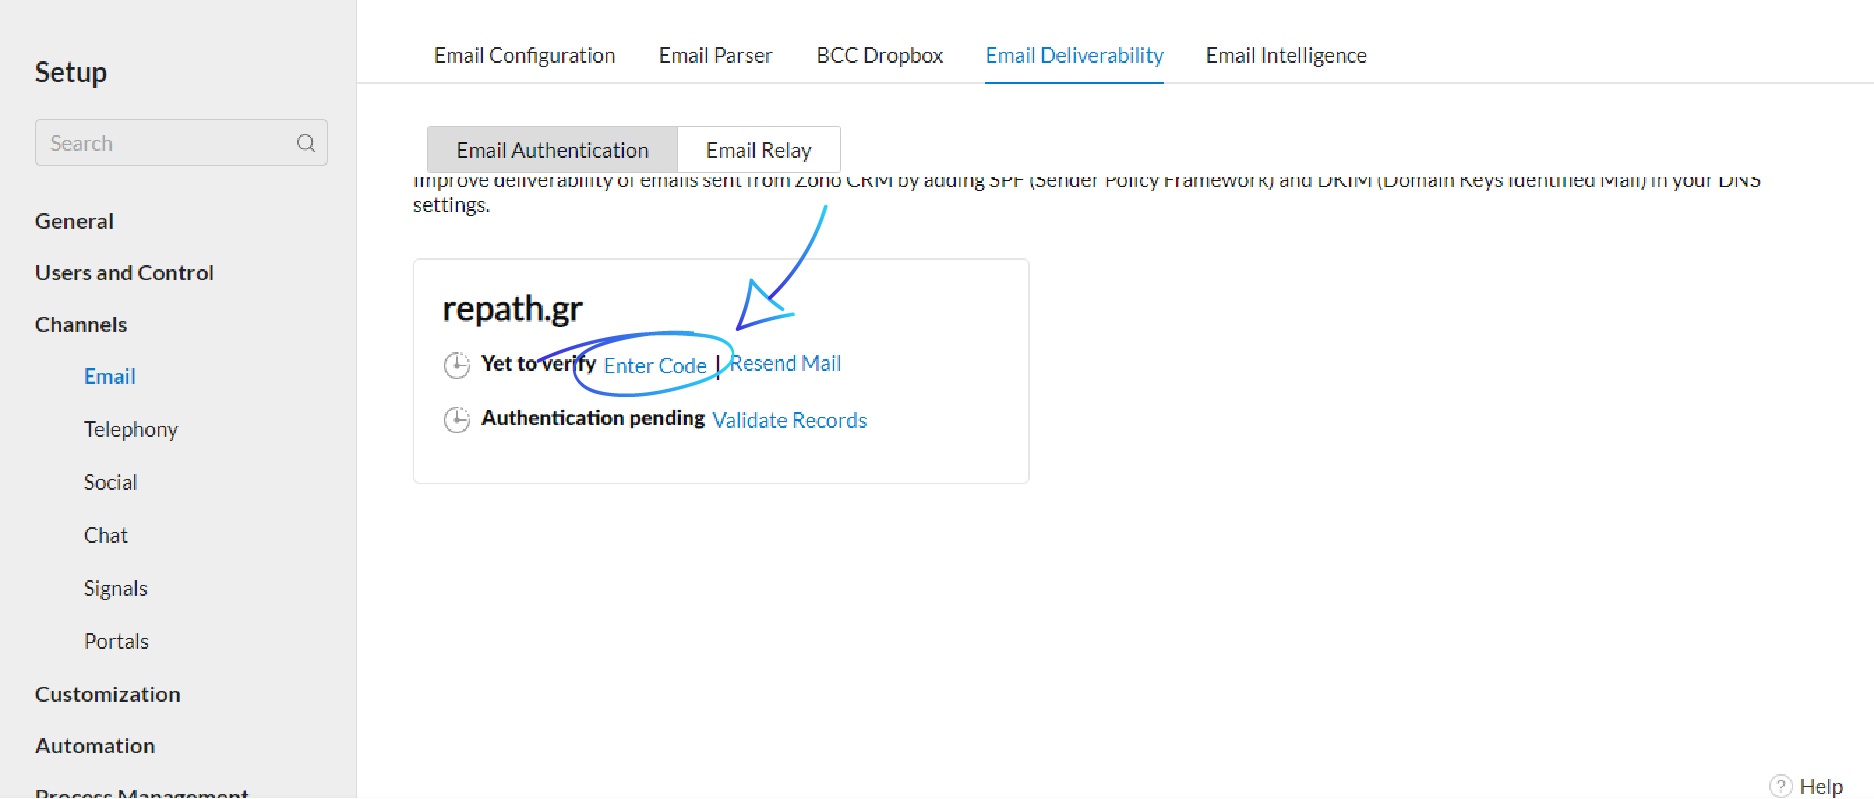
Zoho will send you a verification code. Click “Enter Code”.
Step 4
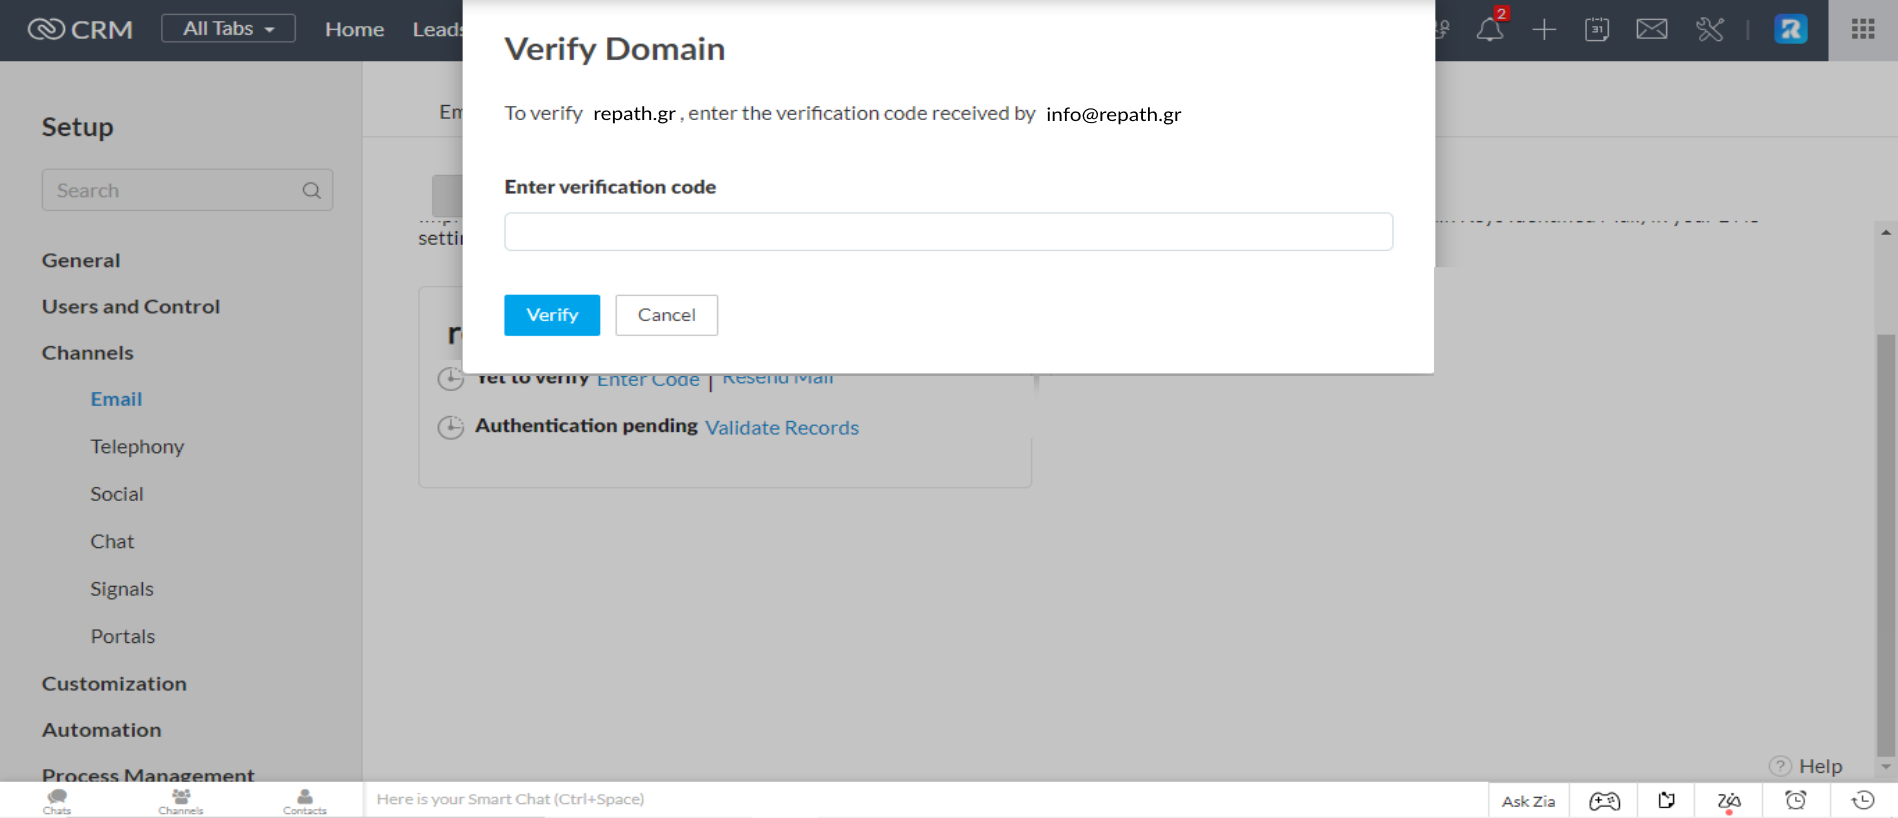
In this new window, add the verification code and click verify.
Step 5
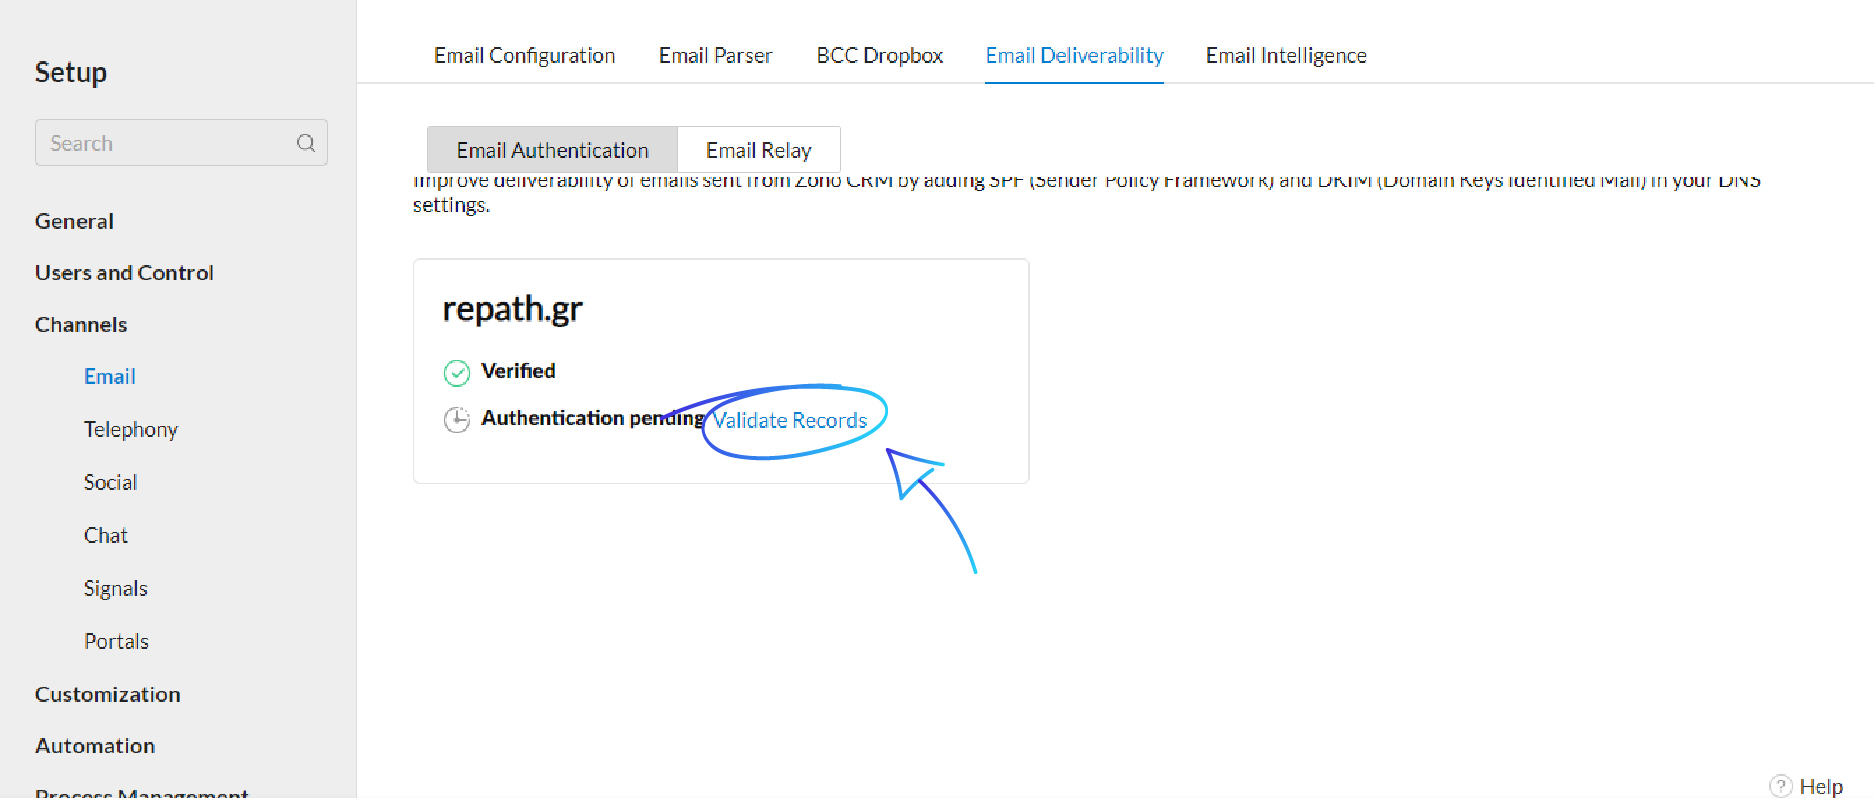
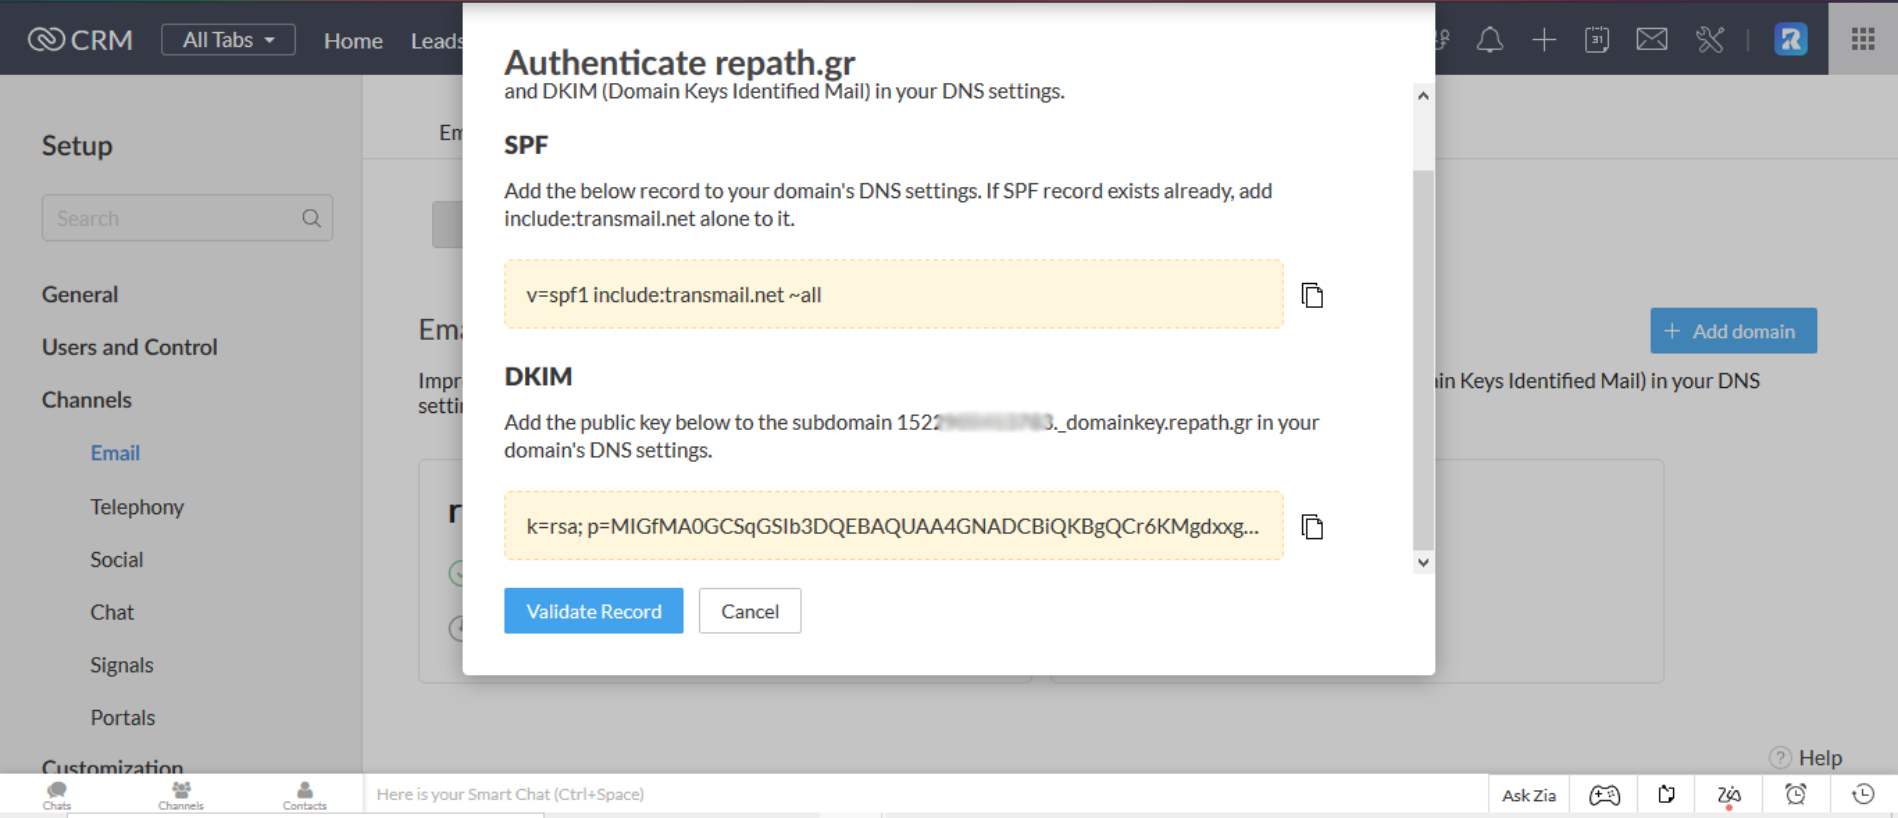
Since you have completed the verification process, you have to authenticate your domain using DNS records (SPF and DKIM records). Click “Validate Records”.
Step 6
A new window will pop up with two values: SPF and DKIM that you will use at your DNS provider.
Step 7
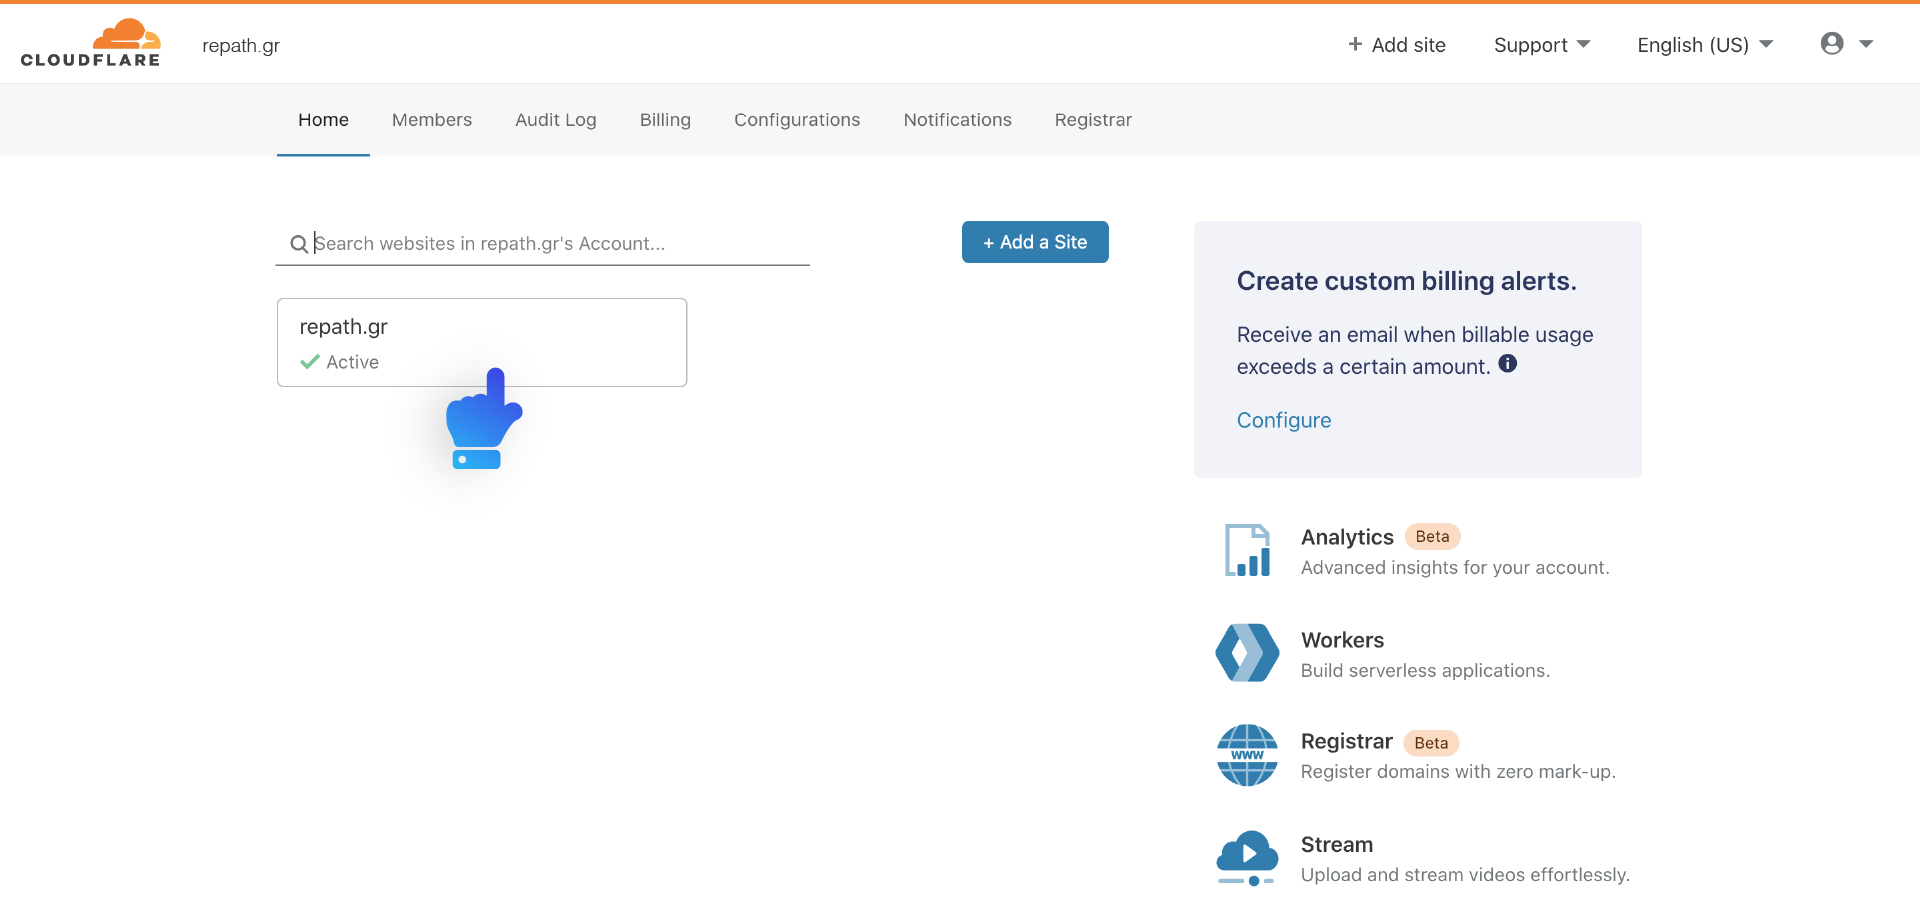
For this guide we are using the Cloudflare DNS provider. Click at the domain you want to authenticate.
Step 8
Click the DNS button (third option) and then select TXT as your method.

Step 9
SPF record might already exist with Name “yourdomain” and value “v=spf1 include: ……… ~all” so you will edit the record and add only the include:transmail.net right before the ~all .
Make sure you select TXT as your method and set the TTL (Time To Leave) to the minimum (2minutes or 120 seconds)

Step 10
For the DKIM record you will create a new record with
Type: TXT
TTL: 2 minutes
Name: 152xxxxxxxxxx._domainkey
Value: k=rsa; p=M……………………., given by zoho

Step 11
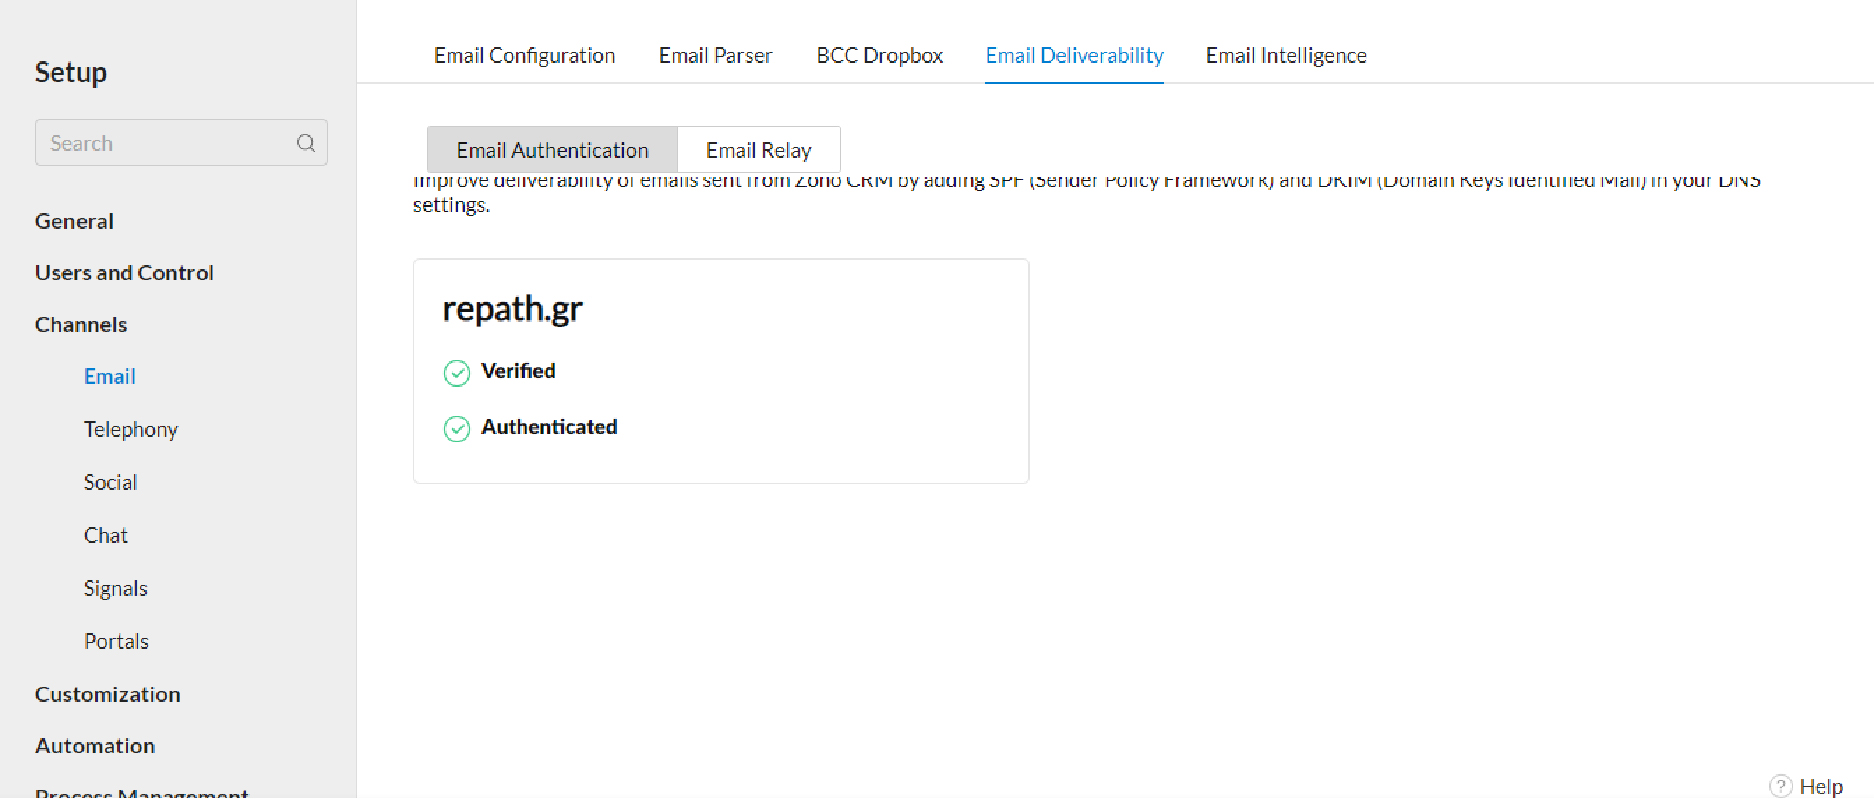
After 2 minutes go to zoho crm select validate records and you are done.
Step 12
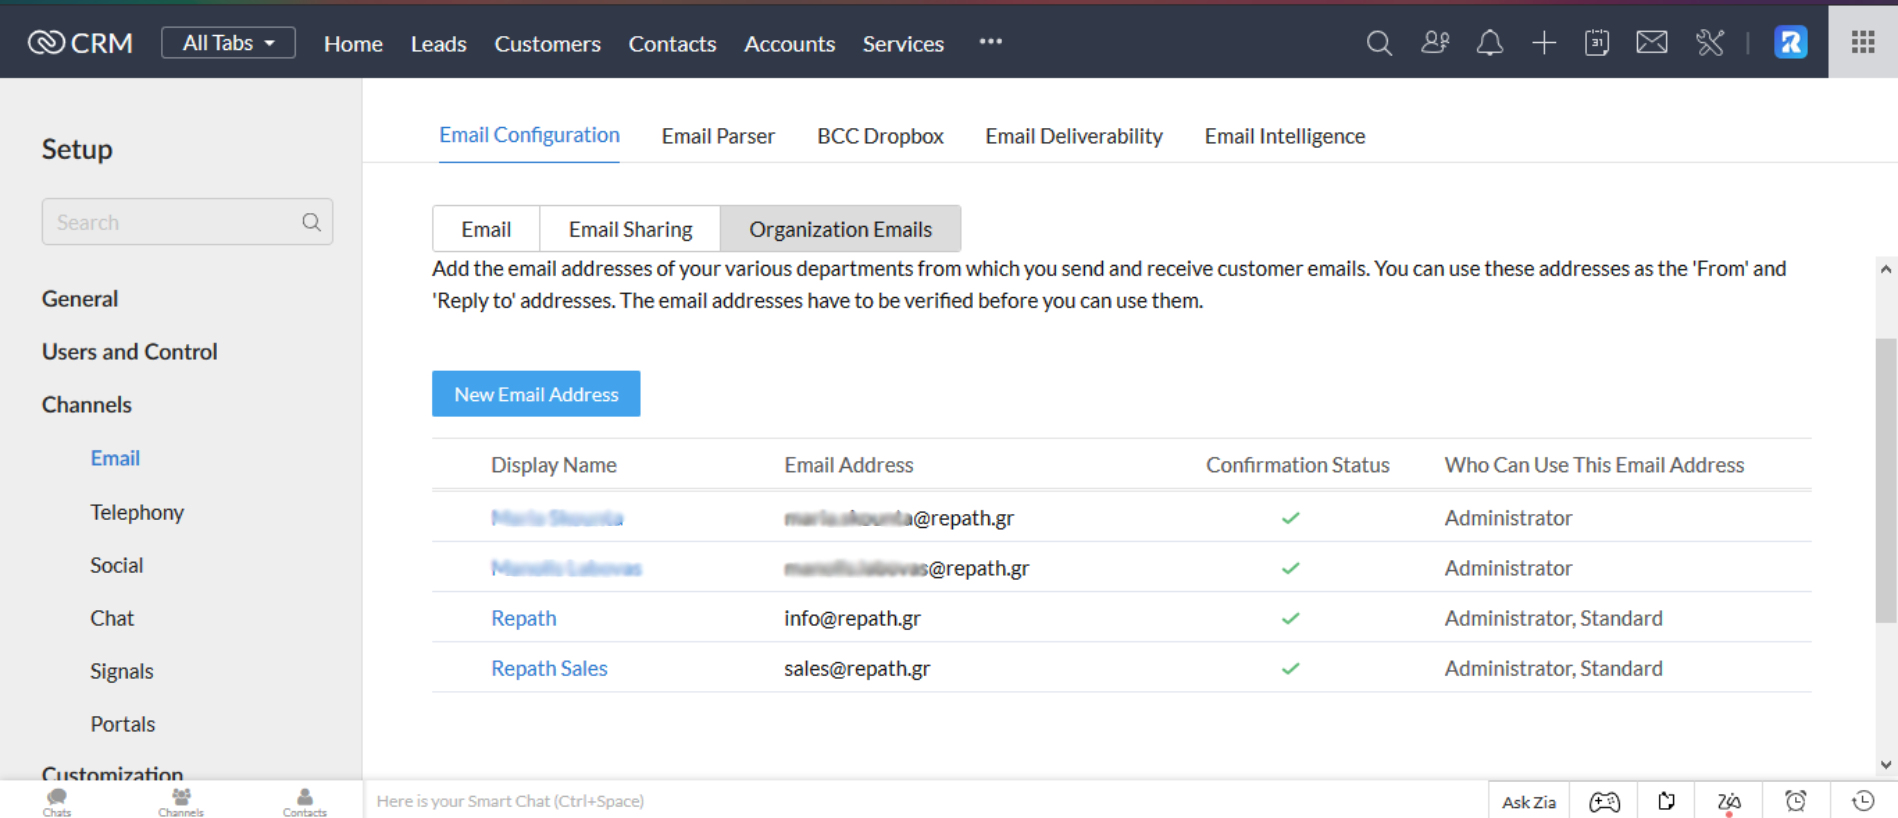
To set multiple senders you have to Go Settings -> Channels -> Email ->Email Configuration -> Organization Emails and add them. A verification code will be send to each one that you have to enter in zoho crm.
By activating email authentication, you can be certain that your emails will reach your customers’ inbox.
If your email senders are not already authenticated, our dedicated team are more than willing to help you follow the right steps.
For more information about how Repath can help your company don’t hesitate to contact us.

